

This is the third and last blog post in a series of three. In the first blog post I explained that you can access Data Integration from different user interfaces and overall how to get started and set up data integration projects from within the Power Apps Web Portal. In the second blog post I gave an example of how to set up a data integration project. In this blog post I will summarize my findings.
Update 2020-07-08: As part of the 2019 Release Wave 2 Data Integration in Maker Portal was rebranded to Dataflows. This article mentions Data Integration in Power Apps Web Portal, that refers to what we today know as Power Platform Dataflows in Maker Portal.
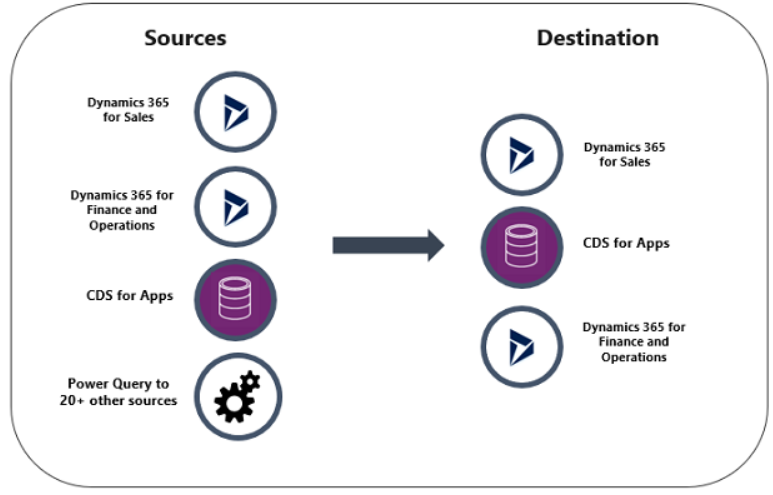
The Power Platform includes a data integration service which can be used for integrating data from different sources into the CDS. There are ready to use connectors and pre-defined templates to your help. Connecting to an onprem source using a data gateway works smoothly from my experience.
Where to start
There are several different interfaces to the same service, but if you want to use the pre-defined templates you need to go to one of the admin centers for Power Apps or Power Platform. Note that the Power Platform admin center is still in preview.
You can schedule your data integration projects both in the Power Apps Web Portal and in one of the two admin centers. But in the admin centers you get a better overview of scheduled and run projects.
Stick to one of the user interfaces – Power Apps Web Portal or Power Apps Admin center. You should not mix those two. At least according to Microsoft, it is not all true though since you have a menu item from the Power Apps Web Portal so that you can reach the admin center from the data integration project to view the history of the execution history.
Number of data integration projects
I have not seen any recommendations from Microsoft regarding setting up the data integration projects. I prefer using one project per entity that you want to write to, the projects then become easier to maintain.
However the downside is that you do not have the possibility to choose an order when you schedule them, i.e. you cannot specify that you want a new project to run as soon as another has completed. Perhaps we can get that from Microsoft as an improvement in the future.
Data transformation using Power Query
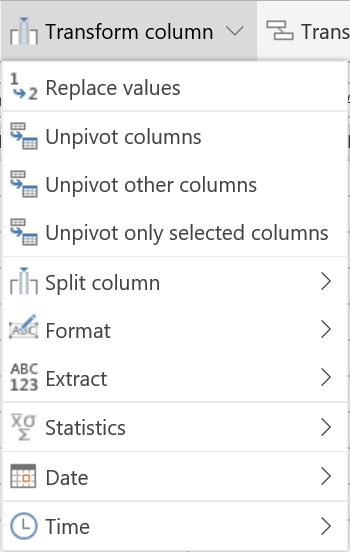
Try to plan your integration so that the source and destination fields have the same data type. If there is a missmatch, do not worry, Power Query comes to your rescue. You can also use Power Query to set filters on your destination data. The below picture gives us an overview of the filtering and data transformation options.

There are three different menus for columns. Under manage columns you can choose to reduce the number of columns. Add column lets you add a column based on criteria from other columns. When you have selected a certain column a third menu appears, Transform column. One useful feature in here is Replace values, which can be used e.g. for replacing null values or setting a code instead of a text when you want to write to a status field for instance. Read more about status fields under the heading “Some other tips, tricks and conclusions”.
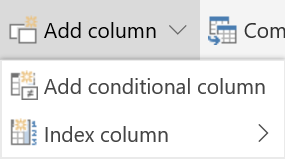
Use the Add column option to create a new column based on criteria from the existing columns. Note that this option does not modify the source, it is just a way of modifying what is written to the destination.

Under Transform table you can find a very useful feature: Count rows. Clicking here will give you the total number of rows in the table. For example you can set a filter first and then click on Count rows and that will give you the number of rows when you use the filter, e.g. setting a filter which gives you all accounts in a certain region and the Count row menu item will tell you the number of accounts in the source for that region. Pretty nice to be able to check that from in here.

Sometimes you do not have the possibility to change the source so that all the data you want to write to a certain entity exists in the same place. In those cases you can choose several tables when setting up your data integration project and then use the combine table option. Then you have the possibility to use data from more than one table, both for setting filters as well as writing data to an entity which comes from different places in the source.

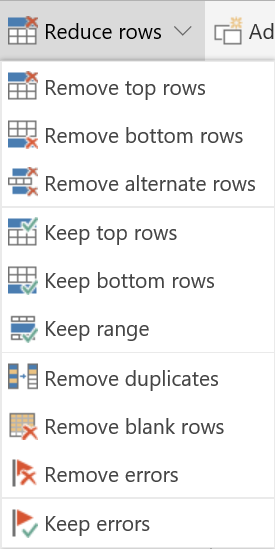
You have the possibility to modify the rows, e.g. to remove duplicates and some other actions under reduce rows.
Transform data into data types that fits your destination
If your source and destination fields are of different types – there are some tricks for putting it all together and making it work. In the top left corner of the column header, when you are on the page before the field mapping page, you have a little icon which tells you the format of the source data. Just click on that icon to change it to a format that fits your destination.
Note that it does not change the source, this is just a nice trick to make sure the data will fit your destination. Below is a summary of what data types that I have used. Note that I managed to set currency fields by setting the source to whole number. In our case whole number was a good fit but perhaps in other cases you might need to use precisions.

Integrate data to lookup fields
We have used alternate keys for the entities we have integrated from the onprem source. For each entity we write data to we have created a new field called Integration key and we have also configured it as an alternative key for the entity. Then we fill it with something unique, e.g. organization number for accounts and social security number for contacts and a unique serial number for some of the entities which do not have a natural unique number.
Mapping lookup fields works fine, as long as you have set up alternative keys. Then the lookups fields show up in the field mapping area among the other fields, but as fieldname.key, where fieldname is the name of the field and key is the name of the alternative key.
What if there are null values in a column for which the destination is a lookup field?
I ran into an issue regarding setting lookups. I got an error in the data integration log that made me understand that there were null in the source on some rows. Then what I did was to create a record in the Dynamics 365 App for that entity with the field that we use for the key set to 0 and I named the record “Missing”. Then I transformed the data from null to 0 like this:
Selected the column header, chose Transform Column and then Replace Values.

Settings filters with Power Query
When creating your data integration project, before you come to the mapping page you have the possibility to change the formatting of the data as already described. You also have the possibility to set filters. On each column, next to the column name there is a little arrow to the right. Clicking on the arrow opens the below window. Here you can set your filters for the column. Click on Filters to get some more options when setting a filter.

Some other tips, tricks and conclusions
Two option sets – the source needs to be TRUE/FALSE. If you have something else – just transform the data type into TRUE/FALSE by using Transform column, Replace values e.g. change YES to TRUE and NO to FALSE.
For currency fields I tried several different approaches before I got it to work. It works fine when I set the source to whole number and map to the destination field (not the base field, but the real field). Note that no precisions were fine in my case, since there were no precisions in the source. However, in some cases you might want to use precisions.
As for now it seems status and status reason cannot be set directly – for now you can use a work-around integrating to another field and then have a workflow to set the status and status reason.
When setting up a connection to the gateway you need to be in the standard environment but can after it has been created there it can be used in the other environments.
I must say so far I am very impressed with Data Integration in Power Platform. I have noticed that it changes continously and fast and I am very much looking forward to seeing how it will become even better in the future.
Documentation and other blog posts
According to the Dynamics 365 and Power Platform April release notes more documentation will be created and available. But until then, this is what I have found so far.
Integrate data into Common Data Service
Release Notes October 2018 – Data Integration
Release Notes April 2019 – Data Integration
Blog posts from Microsoft:
On-Premises Data Gateway documentation:
Install and configure an On-Premises Data Gateway
On-premises data gateway management

Reblogged this on Nishant Rana's Weblog and commented:
Insightful article on Dataflow + CDS !
LikeLike
Reblogged this on All about Dynamics 365, PowerApps, Power Platform and Power Apps portals by Debajit Dutta and commented:
Data Integration in Power Platform Admin centre – One of the few and detailed post on this topic. Wonderful read.
LikeLike